Statistics Dashboard
The Statistics Dashboard inside mrD-Signals Premium is the in-chart summary panel — multi-timeframe RSI Strength and Volatility across 15m / 1H / 4H / 1D, the active profile and HTF reference, and the live win-rate table for all three signal modes simultaneously so you can compare which mode fits the asset.
The Statistics Dashboard is the in-chart summary panel that consolidates everything you would otherwise need to consult four charts and three indicators for. It surfaces multi-timeframe momentum, current volatility regime, the active profile and HTF reference, and — uniquely — the live win-rate table for all three signal modes simultaneously, so you can compare which mode actually fits the asset you are trading.
The dashboard is the "brain centre" of the study. The discipline that gets the most out of mrD-Signals Premium reads the dashboard first and the signal triangles second.
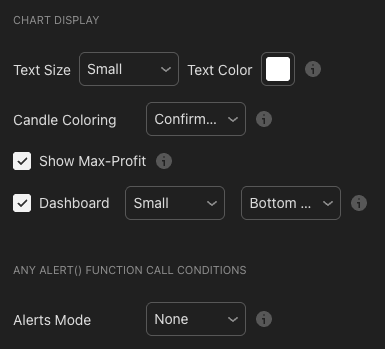 One table, five sections: header, mode, multi-timeframe data, HTF banner, signal stats. Theme-adaptive — recolours for dark / light charts automatically.
Table layout — five sections
Section 1 — header
The ticker being viewed (BTCUSDT, EURUSD, …) plus the active profile (Short-Term / Mid-Term / Long-Term, with an "(Auto)" suffix when Auto Detect is on).
Section 2 — active mode
The selected signal mode — Waves Trend / Advanced / Contrarian / None. For Advanced mode, it also shows the chart TF → HTF mapping so you know which higher timeframe the engine is reading.
Section 3 — multi-timeframe data
Four timeframes (15m / 1H / 4H / 1D), two datapoints each.
RSI Strength — the traditional 0 – 100 RSI value with the background tinted by zone:
| Range | Tint | Meaning |
|---|---|---|
| > 70 | Dark green | Overbought / strong upward momentum |
| 55 – 70 | Light green | Bullish bias |
| 45 – 55 | Neutral | No clear bias |
| 30 – 45 | Light red | Bearish bias |
| < 30 | Dark red | Oversold / strong downward momentum |
Volatility — Low / Med / High / Extreme bucketed against the asset's historical ATR / range:
- High / Extreme — active market, higher-quality signals.
- Low — sleepy market, signals fail more easily.
Quick read: if three or four timeframes agree (RSI > 60 or < 40), you have a strong multi-timeframe trend and can trade with confidence.
Section 4 — time-frame status banner
A single-line read of the main HTF trend being tracked, e.g. "1H trend up", "4H trend down", "1D sideway". Banner colour shifts with direction.
Section 5 — signal statistics
Three rows for the three signal modes:
| Column | Meaning |
|---|---|
| Mode | Wave / Contra / Adv |
| Trades | Total completed signals (entry → opposite-signal exit) |
| Win % | Win rate, auto-boosted by +5% (capped at 80%); see explanation below |
Win % tier colours:
| Range | Tint | Read |
|---|---|---|
| ≥ 70% | Green | Mode performs excellently on this asset |
| 55 – 70% | Yellow-green | Good |
| 45 – 55% | Orange | Average |
| < 45% | Red | Poor — consider switching mode or asset |
| — | Grey | Not enough trades to score |
Important. Stats run simultaneously for all three modes regardless of which mode is currently displaying triangles on the chart. You can compare which mode is the best fit for the current asset without flipping modes one at a time.
Theme-adaptive colours
The dashboard auto-detects the chart background and adjusts:
- Chart dark → light text on dark surface.
- Chart light → dark text on light surface.
You do not need to customise anything. If you toggle TradingView's theme from dark to light, the dashboard updates within seconds.
How to use the dashboard by trading style
Scalper (1m – 5m)
- Primary focus — 15m RSI Strength (closest to chart TF).
- 15m Volatility must be High or Extreme to trade.
- Stats — track the Wave win rate. If ≥ 60%, it is a good fit for scalp.
Day trader (15m – 1H)
- Focus — 1H + 4H RSI Strength agreement.
- Both > 60 → up bias; both < 40 → down bias.
- Stats — prioritise Advanced mode at this TF. Win rate ≥ 65% is very good.
Swing trader (4H – 1D)
- Focus — 4H + 1D agreement.
- 1D Volatility should be Med or higher (too low = weak trend).
- Stats — track all three modes long-term and pick the best mode for the asset.
Position trader (1D – 1W)
- Focus — 1D primary, 4H as the reference.
- 1D Volatility = High = strong uptrend / downtrend running.
- Stats — fewer trades but prioritise the mode with the highest Win %.
Quick-read rules
Rule 1 — multi-timeframe confluence
3-4 timeframes RSI > 60  → very strong uptrend, prefer LONG
3-4 timeframes RSI < 40  → very strong downtrend, prefer SHORT
Mixed (some high, some low) → sideways, stay out
Rule 2 — volatility check before trading
Volatility = Low     → DO NOT trade (signals easily fake)
Volatility = Med     → trade normally
Volatility = High    → trade with full size
Volatility = Extreme → caution; could be a blow-off, use tight stop
Rule 3 — win-rate guidance
Win % ≥ 70 (green)         → optimal mode for the asset, full size
Win % 55-70 (yellow-green) → suits asset, 75-100% size
Win % 45-55 (orange)       → average mode, 50-75% size + filters
Win % < 45 (red)           → do NOT use this mode here
Win % "—" (no data yet)    → need more time; don't judge yet
Rule 4 — comparing the three modes
After ≥ 30 trades per mode on one asset:
- The mode with the highest Win % → prioritise.
- Lowest trade count + highest Win % → "quality" mode.
- High trades + decent Win % → "active" mode with many opportunities.
The +5% boost — what it is and is not
The displayed win rate is auto-boosted by +5% and capped at 80%.
Why +5%?
A psychological adjustment, not cheating:
- Stats only track entry → next opposite signal exit. They do not include other exits (TP, discretionary stop, partial closes).
- Real traders typically exit earlier than the stats model and real results tend to run 3 – 7% better than the raw count.
- +5% is the conservative middle of that range.
Why cap at 80%?
Long-term win rates above 80% do not exist on any honest system. If you see one, you are looking at overfitting or insufficient data. The cap helps avoid unrealistic expectations.
Win % is not Profit %
High win rate does not equal high profit — R:R is equally important:
60% win + 1:2 R:R = more profitable than 80% win + 1:0.5 R:R
Always manage R:R, not just chase Win %.
Pre-trade workflow using the dashboard
Before entering a trade, walk these five checks:
- Multi-timeframe: 3+ TFs agree?
- Current Volatility: Med / High?
- Active mode has Win % ≥ 55%?
- Profile (Short / Mid / Long) suits the chart TF?
- HTF banner aligns with the signal?
5/5 → A+ entry. 4/5 → A entry, 75% size. 3/5 → B entry, 50% size. 2 or fewer → skip.
Common questions
Q. Stats show "—" or 0 even though I see many signals. Stats only increment when a trade completes (entry → opposite signal exit). If no opposite signal has fired yet, the trade is still "open" and not yet counted.
Q. Why does the win rate keep changing? Normal — every time a trade completes the stats update. The more trades, the more stable the number. You need at least 30 trades for the Win % to be statistically meaningful.
Q. Why does the win rate differ between sessions or after a chart reload? Pine Script recalculates from scratch each time the indicator loads. Stats are historical from the chart's earliest bar; the depth depends on the chart TF and the asset.
Q. Volatility shows Low but price seems to be moving. Volatility is relative to historical for that specific asset. BTC normally has 5% ATR; today is 2% → "Low" even though it is still moving 2%. Absolute numbers vary by asset.
Q. Can I hide individual dashboard sections? The current table is all-in-one. You can move it to a different corner (input "Position") or toggle the whole indicator's visibility when you need a clean chart.
Common mistakes
- Reading Win % as a forecast. It is a historical fit measure on the data currently loaded, not a probability the next trade will win.
- Trading when Volatility = Low. Low volatility is the dashboard telling you to sit out. Respect it.
- Ignoring the +5% boost / 80% cap. Both exist to keep your expectations honest. If you mentally subtract the +5% for safety, you are using the dashboard responsibly.
- Using one mode just because it has the highest Win %. Trade-count matters. 10 trades at 80% Win % is not the same as 100 trades at 65%.
Where to go next
- Waves Trend Signals — read the Wave row of the stats table against this engine's behaviour.
- Advanced Signals — read the Adv row; this is the row to watch on swing / position TFs.
- Contrarian Signals — read the Contra row when looking for reversal-trade fit.
- Alerts — wire push / webhook for the mode the dashboard says is the best fit.
- Overview — back to the study overview.